
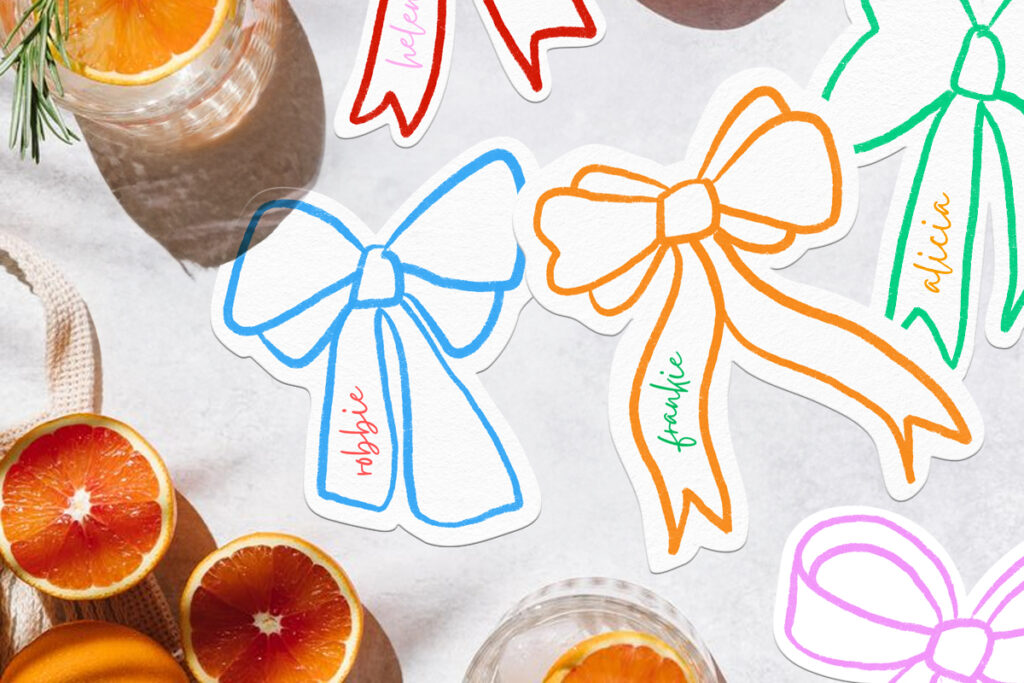
Add a sprinkle of coquette charm to your table decor this Spring with these easy-to-make DIY ribbon-shaped place cards! Not only do they help guests find their seats, but these ribbon shaped name cards are super on trend, and will add a touch of hand made whimsical charm to your table. I make these whenever I host a girly dinner party, and my guests have always somehow found a way to wear them all evening (every single time) – either hung through their necklace or pinned on a shirt. Read on to find out how to draw the classic ribbon shape and then how to turn it into a unique name card for your next event. If you’re stuck for time but still want the look, check out my ready made template here that you can download instantly edit on Canva and print yourself. Let’s get started on this fun and creative project!
Materials Needed:
-
- Cardstock or thick paper
-
- Scissors
-
- Pens or markers for writing names
-
- Optional: Use my free ribbon template to help guide you with drawing the ribbon shape
Step 1: How to draw the Ribbon Shape.
Let’s begin by creating the ribbon shape on your cardstock or thick paper. Follow these simple steps:
-
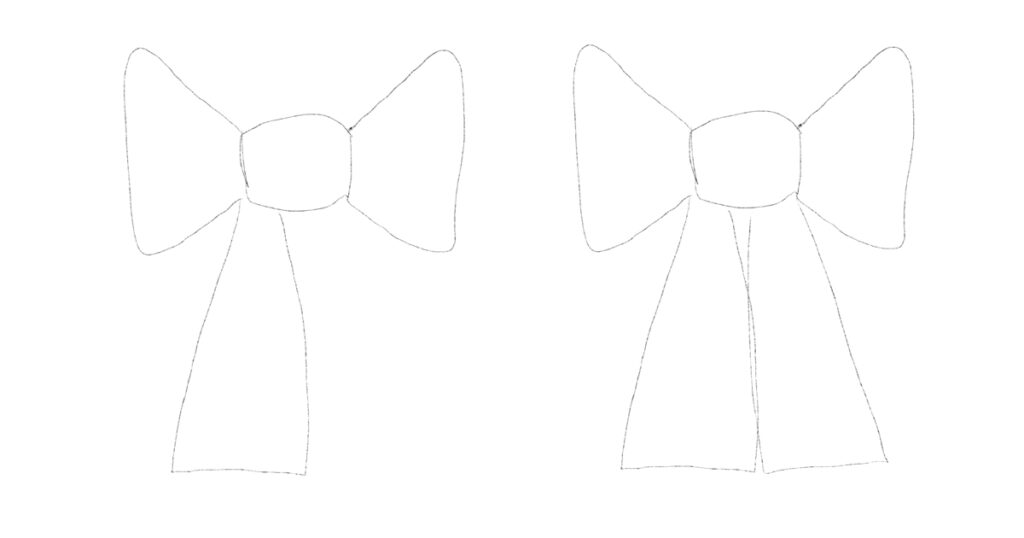
- Start by using a pencil to draw a square-ish shape to form the knot of the ribbon.
-
- Draw a triangle-like shape on the left side of the knot to represent the left part of the ribbon.
-
- Repeat the process for the right side of the ribbon, drawing another triangle-like shape.

-
- Draw another triangle-like shape at the left end of the ribbon’s tie section, almost vertically oriented.
-
- Mirror this shape on the right side to complete the main outline of the ribbon.
-
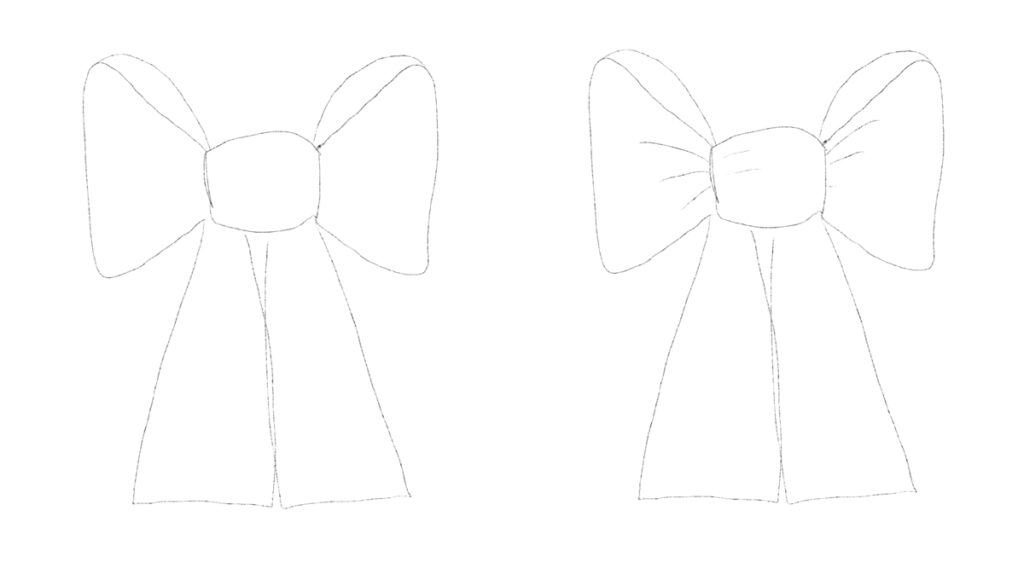
- Add dimension to the ribbon by sketching curved lines connecting the top-left corners of the left and right sections.
-
- Enhance realism by adding a “tight knot” effect with short curved lines along the outer edge of the knot and within the knot itself.
-
- Extend this effect to the ribbon’s laces with longer curved, diagonal lines inside the sections representing the ribbon’s tie.
- Once you’re happy with your pencil drawing, go over your lines with a coloured marker pen or crayon.
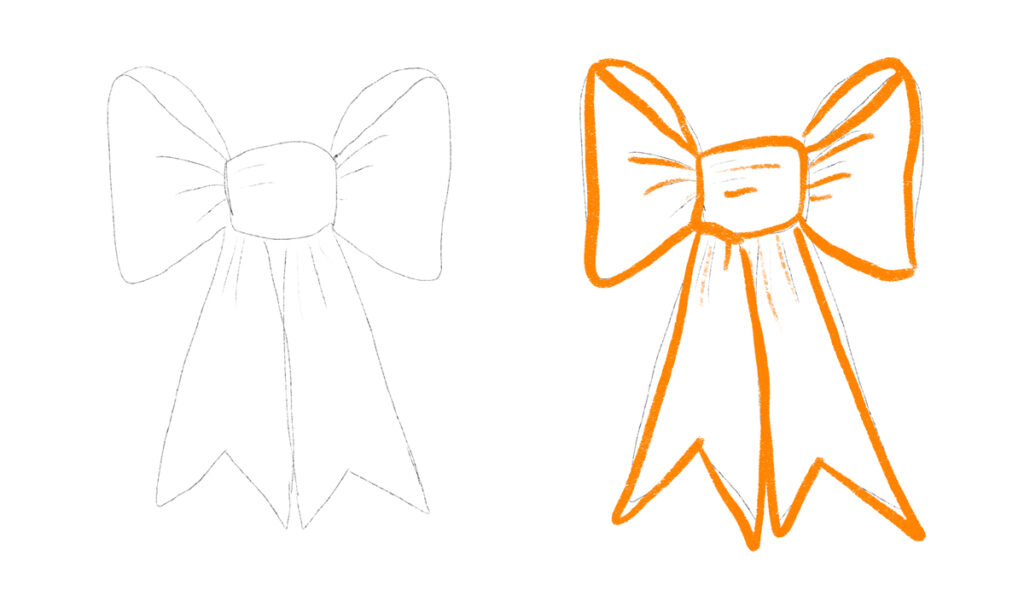
If you need a little bit of extra help, I’ve got a free template that you can download here and trace over.
Step 2: How to Make the Name Card
Once you’ve drawn the ribbon shape, carefully cut it out along the outline. Then, personalise each ribbon-shaped card with the names of your guests using pens or markers. I recommend writing the name along the tie of the ribbon, or in the middle of the knot. Just play around with your designs and see what works best for you! The best thing about this type of style is that it doesn’t need to be perfect – quirky little mistakes add to the ‘hand drawn’ charm. I’ve opted for bright contrasting colours, but you can pick colours to suit your taste. Don’t forget you can download my ready-made ribbon name card template over here if you get stuck for time!
Step 3: Displaying Your Creations
Arrange your finished ribbon-shaped name card on each table setting, either on top of each plate or in a designated display area. You can also embellish them with stickers, glitter, or other decorations for added flair.
Crafting your own ribbon-shaped place cards is a fun and creative way to add a personalised touch to your event, whether it be a girly gathering, wedding, bachelorette party, baby shower or Easter party! With just a few materials and simple steps, you can create charming accents that will guide your guests to their seats in style. Have fun getting crafty, and good luck with the rest of your planning!